
A webinar platform that connects & converts.
Engage future customers and boost your profits.

Your all-in-one webinar solution.
Webinar hosting synced with CRM, Sales Funnels, and Email Marketing.


Maximize attendee engagement and accessibility.
On-screen whiteboard
Enhance live streaming presentations by adding handwritten notes, highlighting key details, or creating visual annotations to emphasize crucial points.
Attendee participation
Invite attendees to join presentations, enabling them to speak, screen-share, or broadcast their webcam, encouraging an interactive experience.
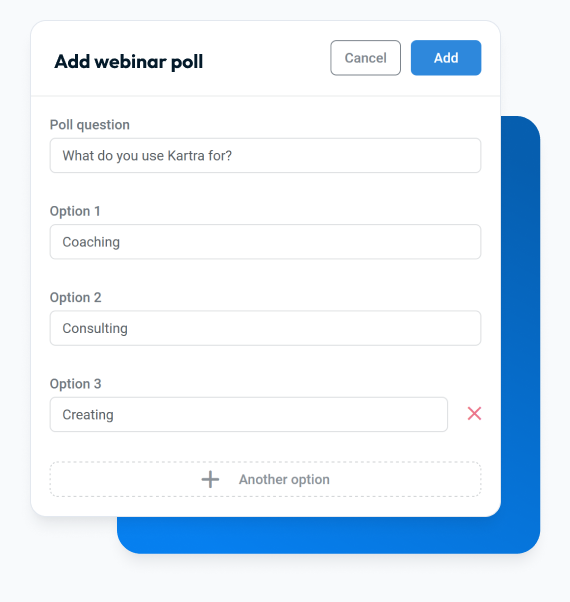
Interactive polls and surveys
Get your audience to engage with live polls, surveys, or quizzes to gauge interests, gather insights, or test knowledge during the webinar.
Versatile event types
Schedule events in advance, create instant live sessions, or establish recurring sessions tailored to your audience’s preferences.
Automate user engagement excellence
Behavioral automations
Activate a range of actions based on your recipients’ behaviors. Whether it’s sending a follow-up message upon non-opened emails, assigning tags for link clicks, or unsubscribing inactive users, Kartra automates these actions and more.
Smart split testing
Kartra conducts split tests for email content and subject lines, tracks conversions, and seamlessly switches to the most effective version.
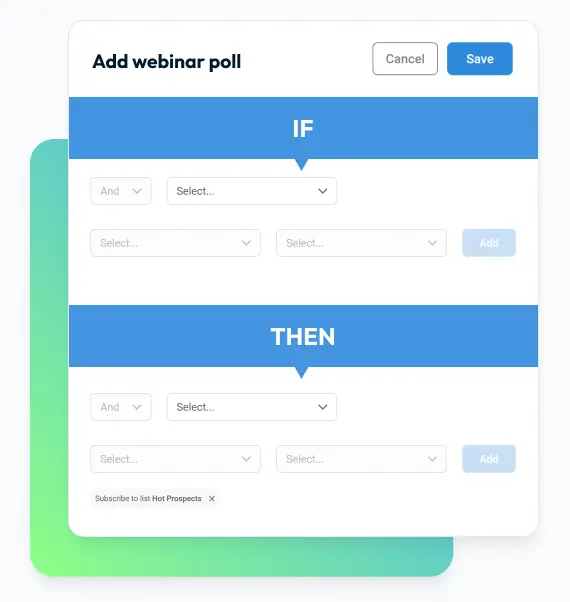
Versatile trigger rules
Define numerous rules to initiate sequences for specific leads. Whether it’s opt-in form submissions, tags, product purchases, subscription cancellations, or membership access, Kartra’s multiple triggers fuel targeted engagement.
Advanced automation features
Harness the engine behind it all! Command ultimate custom rules to optimize your marketing automation sequences.
Streamline your marketing ecosystem for seamless scalability
No need to patch together various marketing platforms. Our webinar features seamlessly integrate with your broader marketing strategies, ensuring lasting engagement after the webinar ends. You can effortlessly link your webinar with your…
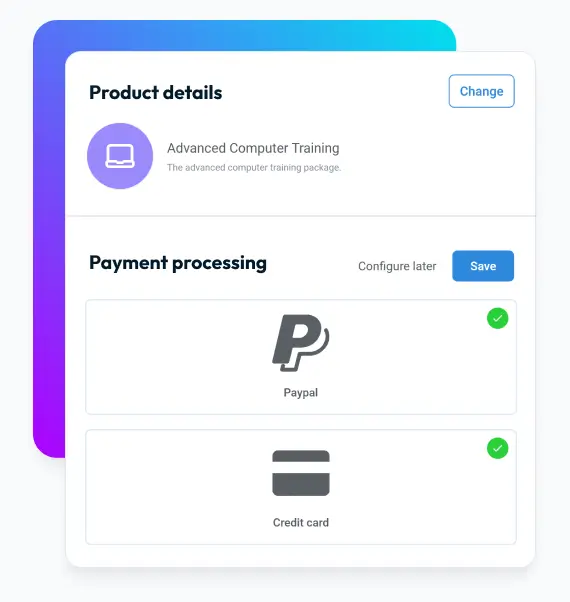
Payment gateways
Facilitating effortless earnings.
Email lists
Ensuring smooth follow-ups with your registrants.
Membership platforms
Educating and engaging your clientele.
Calendar apps
Boosting consultation bookings.
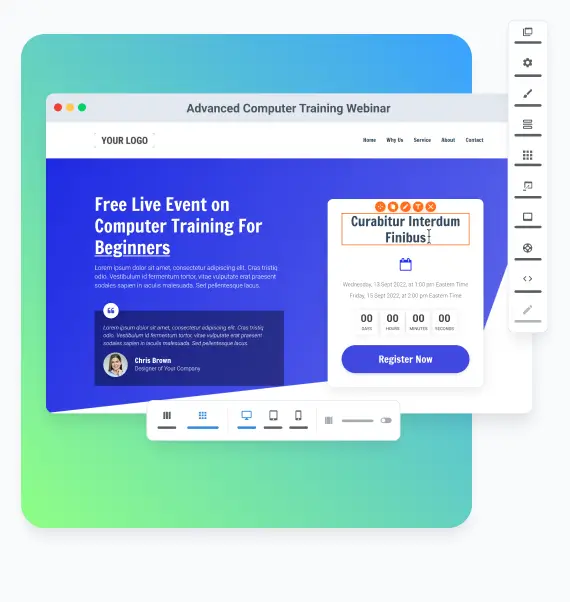
Design the perfect page
Craft your brand’s distinctive identity effortlessly — no designer required. Kartra’s drag-and-drop interface empowers you to create visually stunning webinar pages effortlessly, leaving a memorable impact on your audience.
Customizable templates
Choose from over 500 professionally-designed page and section templates that you can customize.
Mobile responsiveness
Captivate your audience across all devices and preview your creation seamlessly on desktop, tablet, and mobile device modes.
Brand consistency
Import your logo, colors, and fonts to maintain consistent branding across your webinar pages.
Domain hosting
One-click publishing on your custom domain — no coding hassles.

Monetize your webinars
Free webinars or paid webinars
Whether you’re offering seminars or luring high-value clients with affordable online meetings, webinars can significantly impact your revenue stream, whether you charge for attendance or not.
In-webinar product offers
Prompt immediate action from your audience by seamlessly presenting pre-configured, visually compelling call-to-action offers during the webinar, ensuring convenient interaction.
Upsells, downsells, and order bumps
Enhance revenue by integrating additional offers strategically into your sales process, automated to streamline your earnings potential effortlessly.
Customizable promotions and discounts
Take full control over your promotions by setting expiration dates, targeting specific customers, and implementing tailored discount strategies.
Kartra’s webinar platform
key features.
Live rooms
Experience real-time interaction and engagement with your audience through Kartra’s Live Rooms. Host dynamic webinars, workshops, or presentations effortlessly.
Interactive features
Enhance participant engagement with interactive elements like polls, Q&A sessions, and chat functionalities, fostering a more immersive webinar experience.

Recording
Capture and save your live event sessions for on-demand webinars or sharing with those who missed out. Kartra’s recording feature ensures you never miss an opportunity to leverage your content.
Automations
Streamline your webinar flow with automated sequences for registrations, reminders, follow-ups, and post-webinar activities, optimizing efficiency with the best webinar platform out there.
Scalability
Easily scale your webinars to accommodate a growing audience without compromising on performance, ensuring a seamless user interface for all attendees from ticketing all the way through the webinar session.
Integrations and analytics
Integrate with essential tools and gain in-depth insights with detailed analytics. Track attendee behavior, engagement metrics, and performance to refine your future webinars.
Landing page builder
Create visually stunning and high-converting landing pages to promote your webinars effectively with customizable templates for a captivating audience journey.
Native form builder
Craft custom registration forms tailored to gather attendee information, interests, or feedback, directly integrated into your webinar campaigns for streamlined data management.
Custom branding
Maintain consistent branding throughout your webinar experience, from registration pages to live sessions, reflecting your unique identity and professionalism.
Gain valuable insights with advanced analytics.
Advanced analytics empower your understanding of your audience like never before. Gain insights into attendee behavior, engagement levels, and conversions. Then refine your marketing strategies based on informed decisions rather than guesswork.

Traffic analytics
Track visitor volume, sources, and behavior patterns on your webinar pages, understanding where your audience is coming from and how they navigate your content.

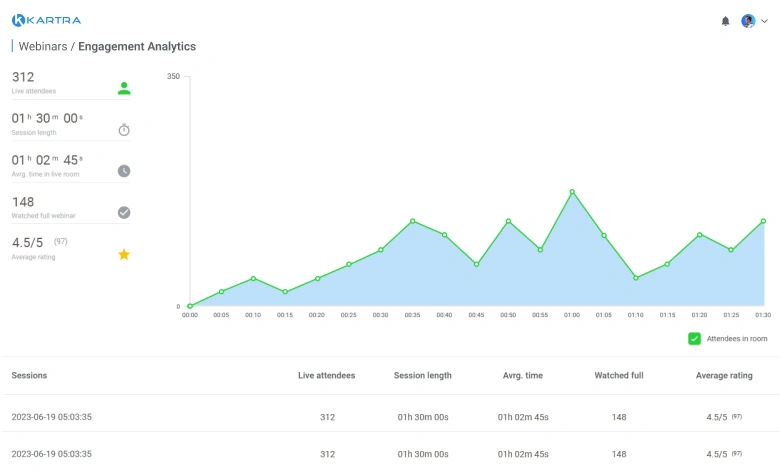
Engagement analytics
Measure attendee interaction during webinars, including chat activity, questions asked, polls participated in, and time spent engaged with the content.

Sign-up analytics
Analyze registration data, including conversion rates, registration sources, and sign-up trends, helping refine your marketing strategies.

Email analytics
Monitor the effectiveness of your follow-up emails, observing open rates, click-through rates, and engagement levels.

Calendar analytics
Evaluate appointment scheduling metrics, such as booking rates, appointment completions, and rescheduling frequencies.

Product analytics
Review data related to product performance, including sales metrics, conversion rates, and customer behavior within your offerings.
Scale with confidence.
Engage audiences of any size, from small interactive sessions to expansive conferences. Utilize
Kartra’s best webinar tools to ensure reliability and seamless scalability.
Up to 5000 attendees
Seamlessly connect with and captivate a large audience. Kartra empowers you to host webinars with up to 5000 attendees, ensuring your message reaches far and wide.
Up to 6 presenters
Enrich your webinar experience with diverse viewpoints. Invite up to six presenters to collaborate and engage your audience with varied insights and expertise.

Invite team members
Collaborate seamlessly. Invite team members to participate as hosts or facilitators, enhancing the webinar’s high quality and efficiency with a unified team effort.
Join 20,000+ entrepreneurs and
small businesses thriving with Kartra.
“Last month I sold over $40k
in online courses all with Kartra…and even managed to squeeze in a couple of holidays.”

Jason West
Kartra user
“Just created my first checkout page
in Kartra for my upcoming product release – mind blown! It literally took me just 3 hours to setup the product, pricing, and the whole checkout process!”

Katie Lendel
Kartra user
“I’m saving about $700 a month
using Kartra to replace several other systems. It’s amazing all the features I am getting all in one place for such a great price.”

Laura Pence Atencio
Kartra user
Webinar platform FAQs
What’s the difference between a webinar and a virtual event?
Does Kartra have a free plan for their webinar platform?
Which subscriptions could Kartra Webinars replace?
Can I host webinars on-demand?
What kind of landing page analytics does Kartra track?
Can I customize the branding on my webinar?
Can I use Kartra’s Webinar Platform on its own?
How many live attendees can I have?